Have you ever stood back after painting a wall, expecting a smooth, flawless finish, only to notice faint brush marks or streaks running across the surface? Kind of frustrating, right? It can even feel like all your effort was for not. After all, you thought you followed the steps to the letter, applied the paint evenly, and even waited for the right drying conditions, yet those unwanted lines appear like an uninvited guest.
So, why does it happen, and more importantly, how do professional painters avoid it altogether? Whether you are tackling a DIY project or planning to hire experts, understanding the techniques that create a perfectly smooth wall can save frustration and ensure your home looks polished and refined.
Achieving a professional finish is not magic; it’s a combination of preparation, the right tools, proper technique, and a little patience. A professional house painter in Telford and the surrounding areas understands that every wall, ceiling, and trim has its quirks, and they approach each surface with a methodical process designed to prevent imperfections.
It’s best to break down the key strategies, tips, and secrets that professional painters use to avoid brush marks and roller streaks while maintaining a high-quality finish that lasts.
Understanding Why Brush Marks and Roller Streaks Happen
Before you can prevent brush marks and roller streaks, it helps to know why they occur. Paint is a liquid that dries at a different rate depending on factors such as temperature, humidity, and the type of surface. Brush marks often appear when the bristles leave ridges or uneven layers, while roller streaks can occur if the roller is overloaded or underloaded with paint, applied too quickly, or not rolled in consistent patterns.
Other factors include:
- Low-quality brushes or rollers: Cheap materials can shed bristles or fibers, leaving lines and streaks behind.
- Improper paint consistency: Paint that is too thick or too thin can create visible marks.
- Inadequate wall preparation: Rough surfaces, dust, and uneven drywall can all contribute to imperfect finishes.
Understanding these root causes allows both DIY painters and professionals to target their approach effectively, addressing the problem at its source rather than just trying to cover it up.
Step 1: Start With a Clean, Smooth Surface
A flawless finish begins before the first brushstroke or roller application. Professionals never skip this step. Walls should be dust-free, patched, and sanded for smoothness. Minor imperfections can magnify once paint dries, and even small bumps can disrupt the consistency of paint application.
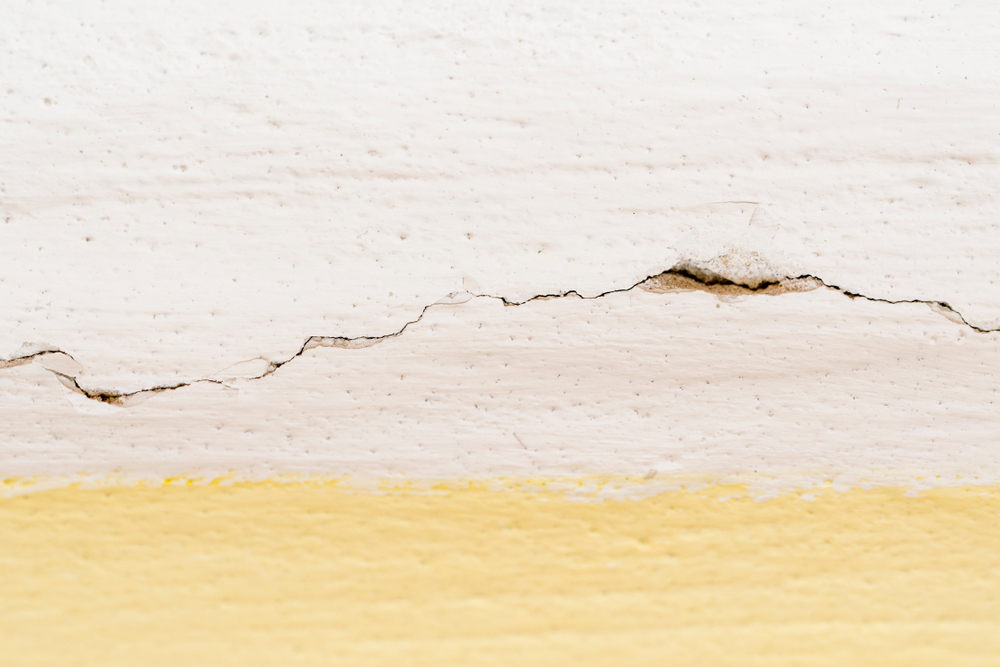
- Patch holes and cracks: Use joint compound to fill gaps or dents, then sand until smooth.
- Remove old paint flakes or peeling areas: Scrape and sand to create a uniform surface.
- Clean the walls: Dust, oils, or residue can prevent paint from adhering correctly and cause streaks.
Taking time to prepare the wall properly ensures that the paint glides on evenly. Professionals often describe this step as the “unsung hero” of a quality paint job, because even perfect technique cannot overcome a poorly prepared surface.
Step 2: Choose the Right Tools
Not all brushes and rollers are created equal. Professionals carefully select tools designed for the type of paint and surface. The wrong choice can leave marks or streaks, regardless of skill.
- Brushes: High-quality synthetic brushes work best with water-based paints, while natural bristles are ideal for oil-based finishes.
- Rollers: Choose the nap length based on the texture of your wall. Smooth walls require shorter naps, while textured surfaces need longer naps for even coverage.
The right tools allow the painter to control the paint more effectively and reduce the likelihood of lines or streaks forming during application.
Step 3: Apply Primer When Needed
Priming walls is a crucial step that ensures consistent color, adhesion, and coverage. Professionals know that skipping primer often leads to uneven texture and visible brush marks. Primer also seals porous surfaces, preventing paint from being absorbed inconsistently.
- Use a matching primer for dramatic color changes: When painting over dark colors with lighter ones, a complementary primer reduces the need for multiple coats.
- Seal repaired areas: New drywall or patched spots often require primer to match the surrounding texture.
Priming provides a uniform foundation, making subsequent paint application smoother and easier to manage.
Step 4: Master the Art of the “Wet Edge”
One of the most critical techniques professional painters use is maintaining a wet edge during painting. This means working in sections and ensuring that each stroke blends into the previous one before the paint starts to dry.
- Avoid stopping mid-wall: Work from one corner to another or from top to bottom.
- Overlap strokes slightly: Blending edges ensures seamless transitions and eliminates lap marks.
- Adjust pace to drying conditions: High heat or low humidity may require faster application or smaller sections.
Maintaining a wet edge prevents paint lines from setting before they are properly blended, which is one of the most common causes of streaks. Professionals often describe it as “painting with fluidity,” where the wall remains continuously workable.
Step 5: Use Proper Rolling Techniques
Roller streaks are often caused by inconsistent pressure or rolling patterns. Professionals follow specific patterns to distribute paint evenly.
- The “W” method: Roll in a large W or M shape, then fill in the gaps without lifting the roller.
- Apply even pressure: Avoid pressing too hard, which can leave lines, or too lightly, which may cause thin spots.
- Reload the roller properly: Overloading leads to drips; underloading causes streaks.
Consistency is key. Professionals practice these motions repeatedly to create smooth, even coverage across entire walls.
Step 6: Keep Brushes and Rollers Wet
Dry brushes and rollers are a major contributor to brush marks and roller streaks. Professionals frequently reapply paint and maintain tool moisture to prevent dragging paint and leaving uneven textures.
- Load enough paint for each section: Avoid scraping excess off the roller on the tray excessively.
- Work in smaller segments if needed: This prevents the paint from drying before blending.
- Mist or dip brushes lightly: Keeping bristles hydrated ensures smooth strokes.
This technique requires attention to detail, but it dramatically improves the finished appearance and makes the wall look professionally done.
Step 7: Choose the Right Paint Type
The type of paint affects both application and finish. Professionals select formulas suited for the wall type and desired sheen.
| Paint Type | Best For | Notes |
| Latex (Water-based) | Interior walls, trim | Easy cleanup, low odor, smooth finish |
| Oil-based | Trim, doors, cabinets | Durable, self-leveling, but longer drying |
| Satin or Eggshell | Living areas, hallways | Smooth, hides minor imperfections |
| Semi-gloss | Kitchens, bathrooms | Durable, easy to clean, highlights imperfections less than gloss |
Understanding the correct paint type and sheen is essential for achieving a flawless appearance. Professionals know which formulas flow smoothly and self-level as they dry, reducing the likelihood of marks.
Step 8: Sand Between Coats
Professionals rarely rely on a single coat. They often lightly sand surfaces between coats to remove any imperfections that may have developed, including slight brush marks or roller lines.
- Use fine-grit sandpaper: 220-grit works well without scratching the surface.
- Wipe dust completely: Residual dust can ruin the next coat.
- Focus on high-touch areas: Edges, corners, and trim are prone to streaks.
This step is a hallmark of professional finishing, ensuring that each layer of paint adheres smoothly and contributes to a perfect final result.
Step 9: Monitor Drying Conditions
Temperature, humidity, and airflow all affect paint drying. Professionals monitor environmental conditions and adjust application speed and tool choice accordingly.
- Ideal room temperature: Most paints perform best at 60-80 degrees Fahrenheit.
- Manage humidity: High humidity slows drying, increasing the risk of marks.
- Allow sufficient drying time: Avoid re-coating too soon.
Managing the environment is just as important as technique. Even the best tools and paint can show streaks if drying conditions are inconsistent.
Step 10: Use Finishing Touches
The final touches make a professional paint job truly stand out. Professionals inspect walls closely for minor imperfections and touch them up carefully without leaving noticeable corrections.
- Blend edges with light strokes: This prevents visible patches.
- Check from different angles: Lighting reveals streaks or brush marks not visible head-on.
- Use high-quality tools for touch-ups: Small brushes for corners and trim make a big difference.
Attention to detail in the finishing stage ensures the wall looks uniform, polished, and completely professional.
When to Hire a Professional Painter
While DIY painting can be satisfying, avoiding brush marks and roller streaks requires skill, patience, and the right tools. Hiring professional painters offers several advantages:
- Experience with diverse surfaces: Professionals know how different walls react and adapt technique.
- High-quality tools and materials: Ensures smooth application and proper paint type.
- Time savings: Projects are completed efficiently without sacrificing quality.
- Peace of mind: Professionals handle the cleanup, preparation, and finishing touches.
For homeowners seeking a flawless finish without the stress, professional services are a wise investment.
Common Missteps That Lead to Imperfections
Even with preparation, several common mistakes can sabotage the finish:
- Skipping primer or sanding before painting.
- Using the wrong brush or roller type.
- Overloading or underloading paint.
- Not maintaining a wet edge or consistent rolling pattern.
- Re-coating before the previous layer has dried.
Awareness of these pitfalls allows DIY painters to anticipate issues and correct them proactively.
Achieve a Finish Worth Admiring
Achieving a professional-looking paint job free of brush marks and roller streaks is a blend of preparation, proper tools, careful technique, and attention to detail. From cleaning and priming walls to maintaining a wet edge, using the right rollers, sanding between coats, and managing drying conditions, every step contributes to a flawless finish. Whether you need deck painting in Richboro or your dream of a stunning accent wall fully realized, we’re the team to do it.
Our crew of professionals master these steps through experience and training, delivering results that elevate the entire look and feel of a home. Proper Painting combines skilled craftsmanship, high-quality tools, and proven techniques to ensure your walls look perfect. Whether tackling a single room, your entire home, or detailed trim work, professional painters bring consistency, efficiency, and polish that DIY methods often cannot match.
If you are ready to enjoy smooth, beautiful walls without the frustration of streaks or marks, reach out to Proper Painting for a consultation and let experts transform your space.


